
You’ve signed up for Displate, filled out your bio information, and uploaded your best designs. Great! Now, the next step is making sure your future buyers are going to find your work. In this guide, we’ll cover tips on naming, describing, and tagging your art to give you the best fighting chance to get discovered and start making sales. We’ve also thrown a bonus tip at the end!
How to Get Found on Displate (and Other Search Engines)
Even the most incredible design won’t sell if no one can find it, so it’s well worth spending some time to help shoppers discover your art. But how can you make sure your pieces surface when people are searching for artwork just like yours?
The first step is understanding how our search engine works. In short, it combines data from each design’s title, description, and tags to determine which artworks are the most relevant for a given query. This means that it’s essential for you to make sure all your work is appropriately named, described, and tagged, so your content reaches the right eyes (and wallets). An added bonus? The more discoverable your artworks are on Displate, the greater visibility you obtain on other search engines like Google or Bing!
Below, we’ll go into more detail on how to make the most of each field and get your art the exposure it deserves.
Naming Your Artwork
Choosing a good title for your design is one of the most important things you can do to help it get discovered. Here are a few tips on how to do it right.
First and foremost, be descriptive. A title like Cityscape might be accurate, but it doesn’t give users any information about what they’re actually looking at. A more informative title might be New York Cityscape at Night. Now someone specifically searching for a design of the New York skyline at night will be able to find your artwork much more easily.
Second, your title should be unique. That means no generic titles like Watercolor or Abstract Painting. If someone else has also titled their design Watercolor, our search engine will have a hard time determining which one is more relevant to a given user’s query, and your work will likely get lost in the shuffle. So be sure to come up with something that accurately describes your piece but at the same time sets it apart from similar designs.
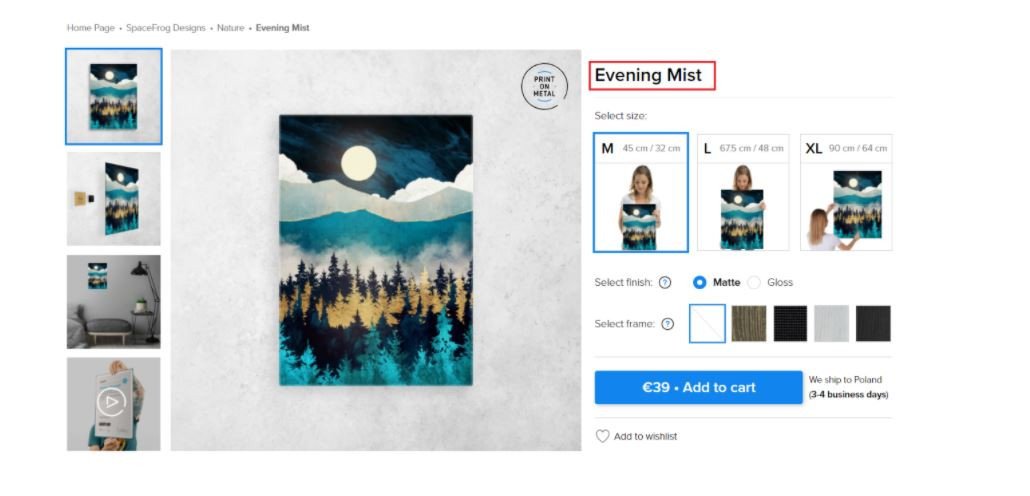
Finally, instead of describing what is already present in the work, you can think of the title as an additional part of the art that provides something new, enhancing what is already there. In the design below by SpaceFrog Designs, an obvious title choice might be Abstract Landscape, but instead, they chose Evening Mist: a simple yet evocative title that stirs notions of mood and time of day.
Describing Your Artwork
After you’ve given your piece a title, it’s time to write a description. This is where you can go into detail about the design’s features and why someone might want to buy it.
Just like with the title, you want to be as descriptive as possible. But unlike the title, you have more room to work with, so feel free to really flesh things out. Include as many details as you can, like the design’s subject, what inspired it, the colors used, etc. This will give potential buyers a better sense of who you are as an artist and what they can expect from your work.
Descriptions are also important from a search engine perspective. The more text you include and the more unique it is, the easier it will be for our search engine (and other search engines) to find and interpret your content. That means no duplicate descriptions – not even for different versions of the same design!
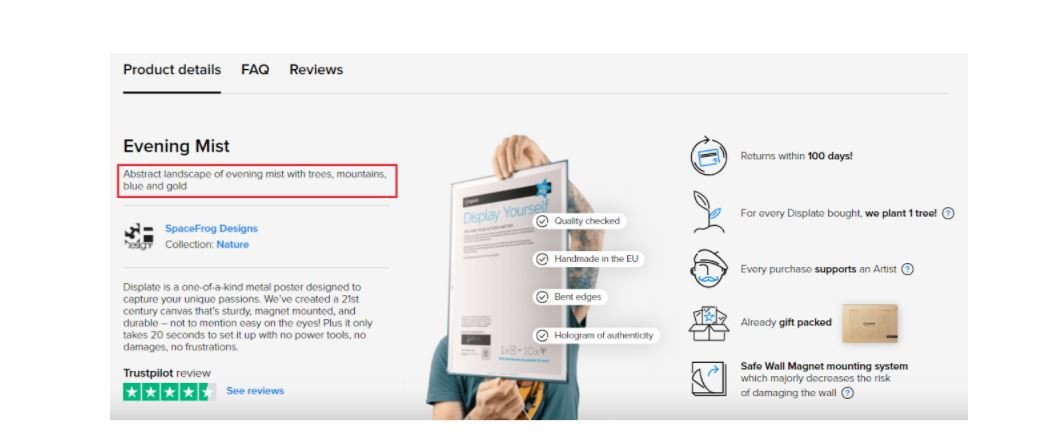
Below is an example of a description by SpaceFrog Designs. Albeit short, it hits all the key points: “abstract landscape of evening mist with trees, mountains, blue and gold.”
Tagging Your Artwork
The last piece of the puzzle is tagging your design. Tags are essentially keywords that help our search engine (and others) categorize and find your work. On Displate, you can add up to 15 tags for each design you upload. Just one caveat: always make sure you are happy with your tags before you submit your work for approval, as you won’t be able to edit them later on.
To maximize the benefit of tags, we recommend adding relevant tags only, organizing them from the most to the least important and adding keywords that are specifically:
- The subject of the artwork (e.g., fairies, wildlife, spaceship)
- Mood, genre, occasion (e.g., dreamy, anime, Halloween)
- Locations and settings (e.g., France, Central Park, grocery store)
- Colors (e.g., orange, pastel, monochrome)
- Techniques or medium types used (e.g., watercolor, photography. low-poly)
Before we dig into practical actions you can take as an artist to improve your tags, let’s go over some stats.
Of the five million phrases our users searched for in 2021, only three million produced results. This means that a staggering two million searches went completely unanswered because the tags didn’t match what our users were looking for. What does this tell us? There are plenty of keywords yet to be explored and monetized — you just need to find the right ones for your designs.

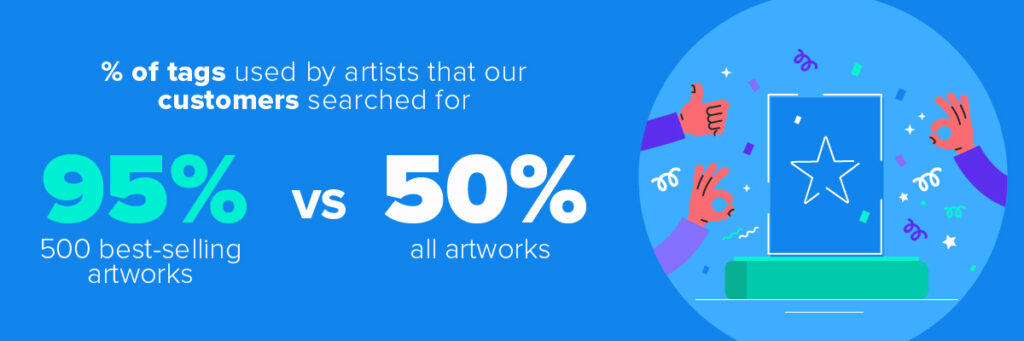
Although only 50% of tags used by artists appeared in search queries of our users when we look at the top 500 best-selling works, this number went up to 95% — almost all of them were successfully found via tags. As you can see, there is a direct correlation between successful tagging and increased sales. In other words, if you want to sell more, start by taking a closer look at your tags.
Tagging Do’s and Don’ts
While it may be quick and easy to just plonk a few random tags on your artwork (which, trust us, can be worse than no tags at all), an effective tagging strategy remains one of the most important aspects of promoting your art and improving your reach on Displate. Knowing this, we’ve put together a list of do’s and don’ts that will keep your tagging practices in check.
The Tagging Do’s
- Organize the tags from the most to the least important
Think carefully of what tags describe your artwork the best and put them in the right order. Try to be the most specific you can and make sure the tags are relevant to the image itself.
- Stay relevant
Selecting tags that suit your designs is one way of getting them in front of the right people who are actually interested in your content. That’s why it’s important to use relevant tags only — if you try to stuff in a bunch of random keywords in the hope that something will stick, not only will it not work, but it may actually hurt your chances of being found.
- Include multi-word tags
Don’t limit yourself to single-word labels; multi-word tags are perfectly usable, too! For instance, if you input “Lake Tahoe” as a tag, it will appear in searches for both lake and Tahoe. This way, you can cast a wider net and reach people who might be interested in your art but searching for different terms.
- Mix in some niche tags
If you want your designs noticed, use a combination of popular and specific tags. For example, if you have a series of artworks, you can make a tag for that series to help users find any and all art related to it while still including the more common searchable tags, too.
- Use 7-15 tags on each design
You can add up to 15 tags, so be sure you’re utilizing as many as possible to define your work. A good rule of thumb is to include a minimum of 7 tags per artwork and make sure they’re relevant to the design itself as well as any themes or styles you used.
- Separate your tags with a comma
Once you have finished editing one tag, type a comma to enter the next tag. When you are tagging a design with multiple words, be sure to use spaces between each word. For example, if you want to tag a design with “Central Park,” input it as “Central Park.”
- Check your spelling
Typos in your tags mean your art may not be discovered, so double-check all of your keywords before hitting the submit button. Remember, once your artwork is approved, you won’t be able to change them!
The Tagging Don’ts
- Don’t use meaningless tags
Don’t try to game the system by tagging your design with popular, general terms like “bestselling” or “trending” in the hopes of getting more views. Not only is this ineffective, but it can also result in your artwork being hidden from search results altogether.
- Don’t add your name
This might seem like a no-brainer, but we still see people doing it. Because our search engine is designed to help users find art based on specific keywords, using your name as a tag is not going to be very helpful. Instead, focus on using tags that describe your work.
- Don’t skip spaces between words
Unlike social media hashtags, marketplace tags need spaces between them. This means that if you want to use multiple words in a tag, you’ll need to use a space to separate them. For example, “newyorkcity” wouldn’t be an effective tag, but “new york city” would.
- Don’t use social media hashtags
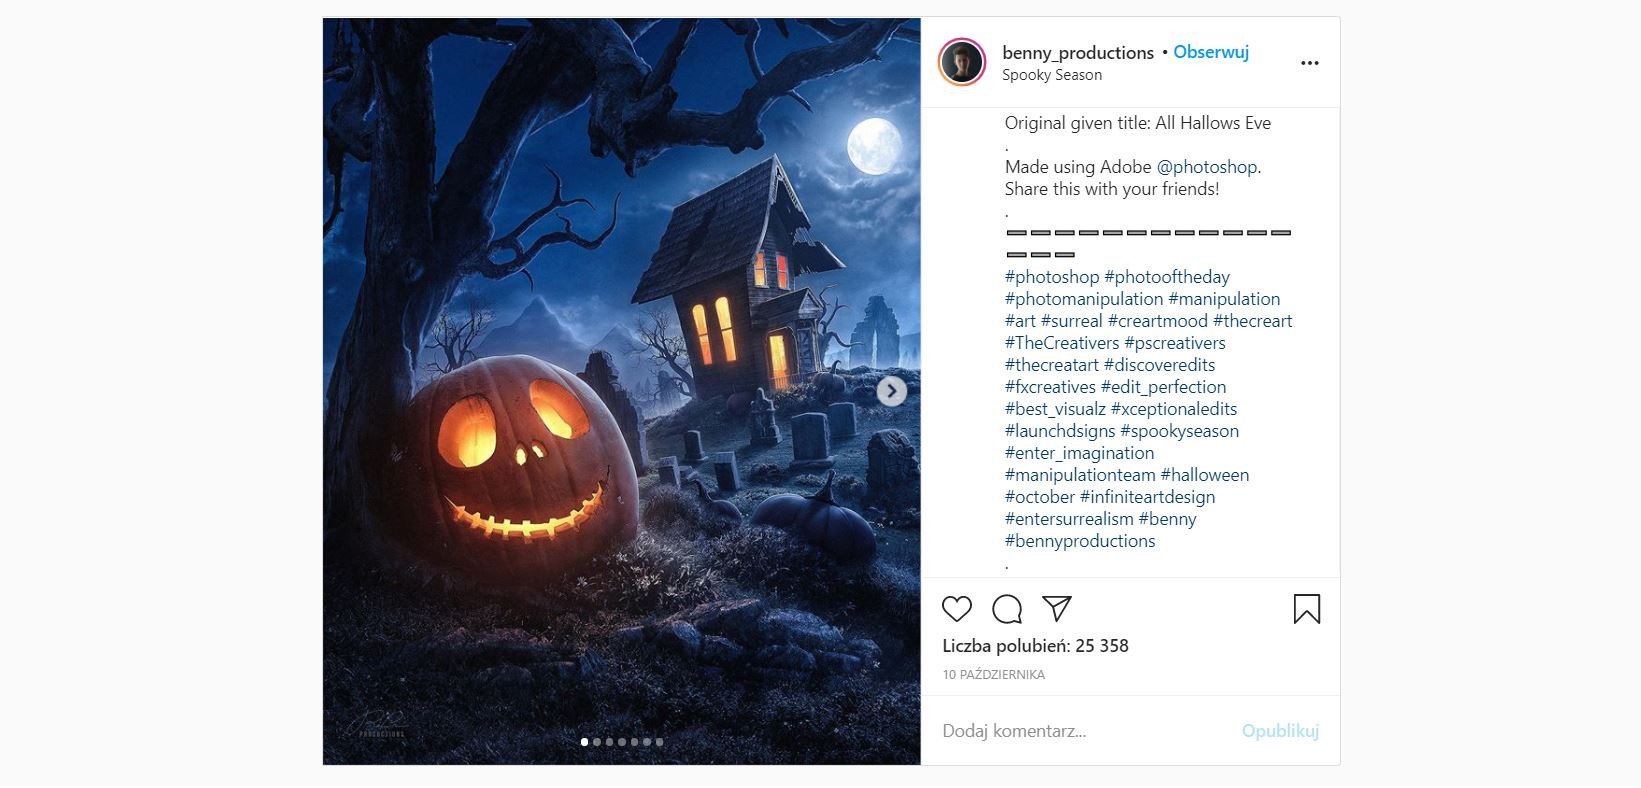
While a hashtag like #photooftheday might be popular on Instagram, it’s not going to do you much good on Displate. In a similar vein, pound signs or emojis won’t work in marketplace tags, so leave them out!
- Don’t mention equipment used
Tagging an artwork with your camera brand or lens type is not going to help users find your work any more effectively. Not only do these tags provide zero information about the artwork itself, but they can also prevent more relevant keywords from being seen.
- Don’t worry about grammar
You don’t have to worry about grammar when tagging your designs. For example, you don’t need to use conjunctions (and, but, or) or prepositions (on, in, at). Just enter the relevant keywords and phrases as they come to mind. The search engine will do the rest!
- Don’t duplicate tags
If you have a design with a cat in it, you might be tempted to tag it with “cat” and “cats.” However, this is unnecessary and will only clutter up your tags. The search engine will index your design for both “cat” and “cats,” so there’s no need to include both forms.
- Don’t use profanities
When tagging your artwork, it’s important to avoid using profanity or any other offensive language. If you want to make sure your artwork is seen by as many people as possible, keep your tags clean and appropriate for all audiences!
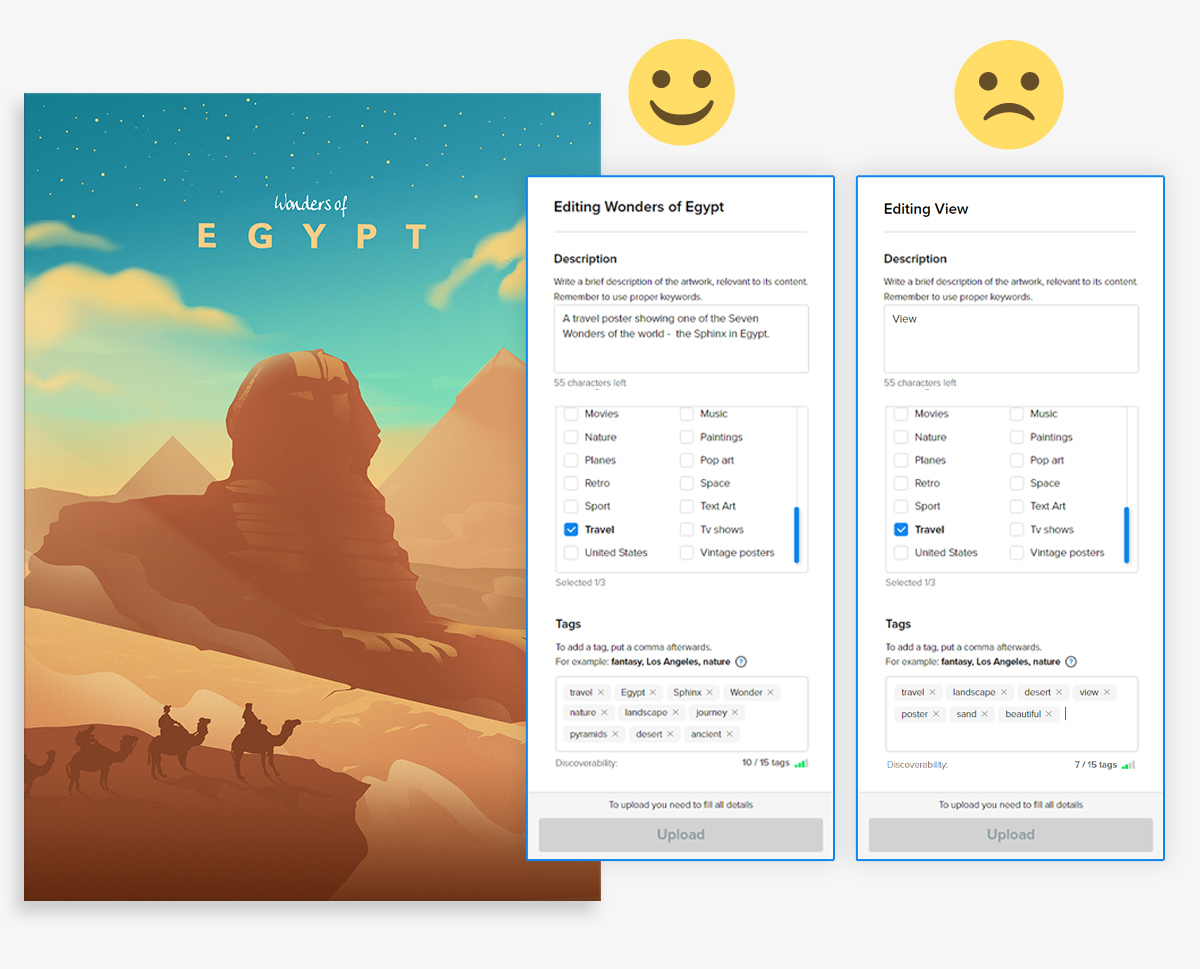
Below is an example of tagging done right.
How to Choose the Right Tags
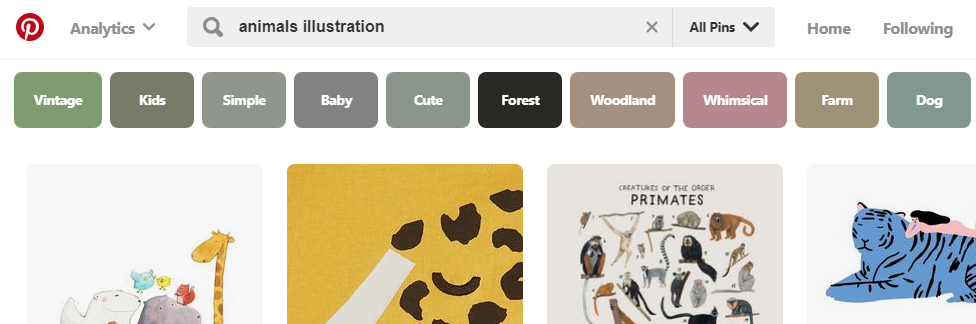
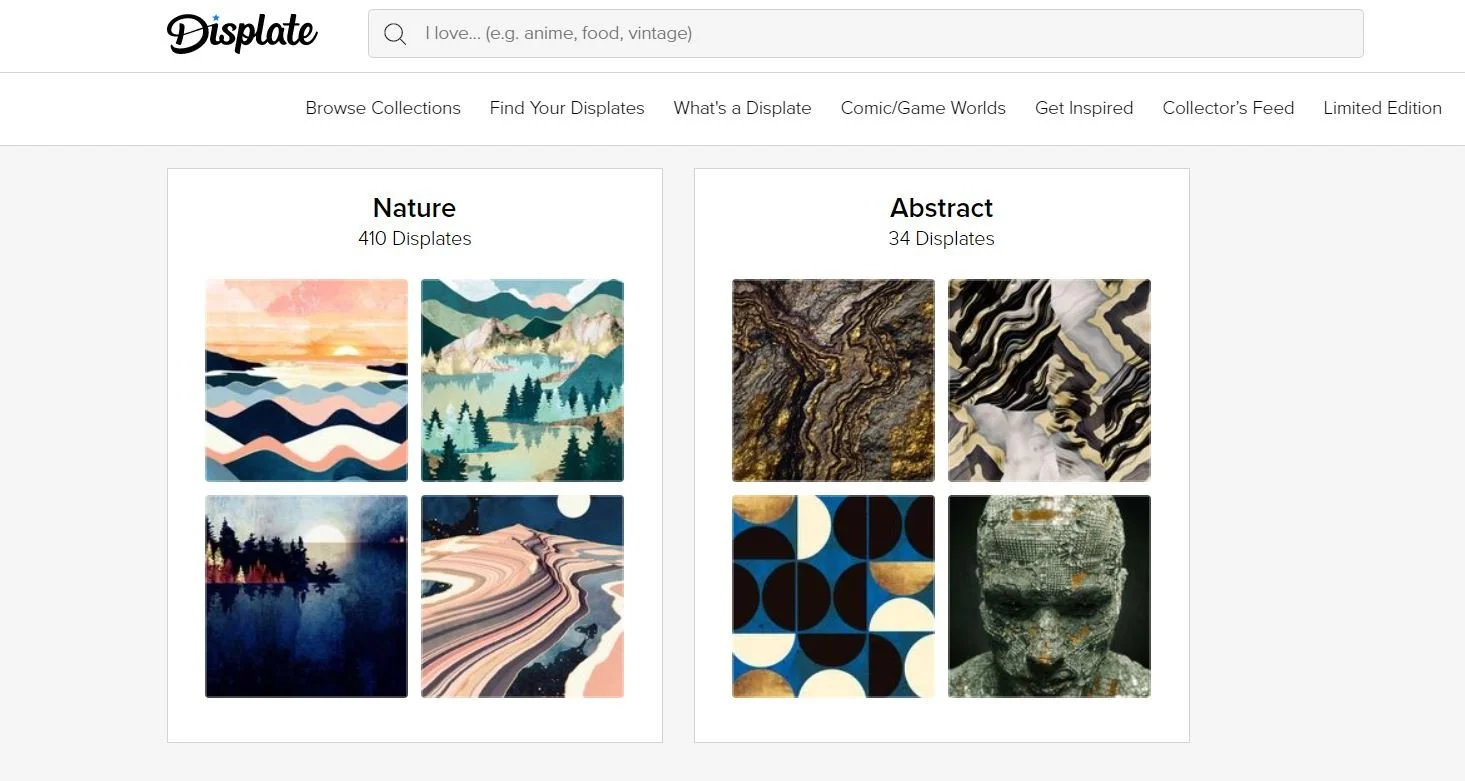
If you’re struggling to come up with the right tags, feel free to use our search engine to see which designs pop up for various queries and how your fellow artists are tagging their work. You can also use social media platforms to get ideas for relevant terms.
Get inspiration from #hashtags
Explore auto-suggested phrases
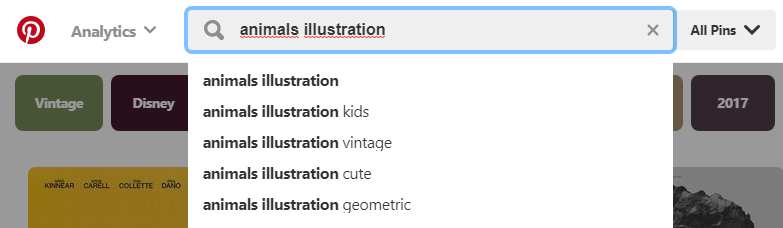
Check search bar suggestions
Bonus Tip
Still craving more tips on bringing your artwork to the top of search results and making some green while doing so? We’ll let you in on a little secret: collections sell best. By adding your designs to carefully curated collections, you make it easier for customers to find what they’re looking for. In fact, a set of 15 artworks generates, on average, 14.5 times as many sales as a standalone design. Talk about a goldmine!
Over to You!
There you have it. Three tactics (and a bonus tip) to ensure your designs appear in front of as many interested buyers as possible. By thoughtfully naming, describing, and tagging your works, you can make it easier for people to find – and fall in love with – your art.
What are some other tips you’ve used to get found online? Let us know in the comments below!
